Today's entry will finish up all but the testing of the Firewall Forward wring section.
Reference: page 45A-05
Step 3: Insert the Fuel fitting elbow into the bracket from below. Attach the Fuel Pressure Sensor into the elbow using pipe thread sealant.
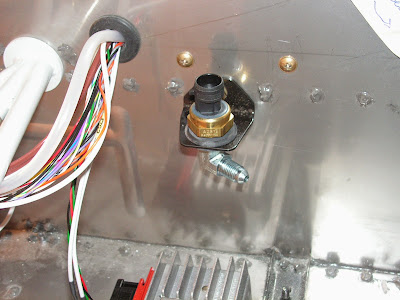
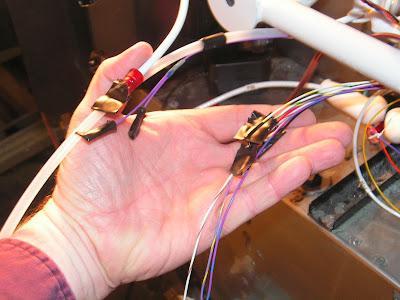
Step 4 & 5: Cut the three wires coming from the Fuel Pressure Sensor at least 1/2" from sensor body. Install wire connectors and then attach the three twisted wires with the corresponding colors coming from the wire harness
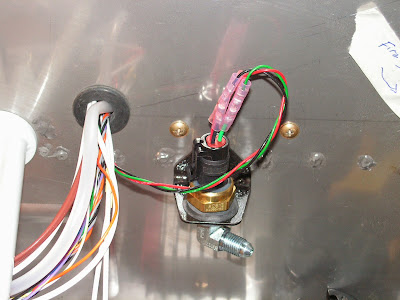
This completes page 45A-05.
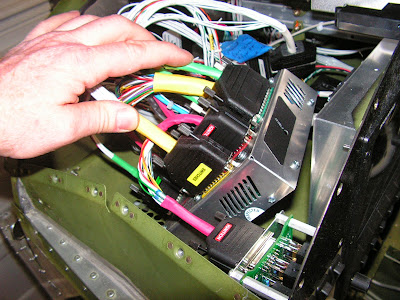
Reference: page 45A-09
Builder's note: In preparation of powering up the electrical system, I taped the ends of all exposed wires. And temporarily installed the radio, xponder and ADSB antennas. Also removed the fuel pump fuse so it wouldn't run dry.

Step 1: Make the potentiometers easily accessible. I removed the Top Fuselage cover and removed the mounting screws from the AV-50000A Control module. NOTE: The unit must be grounded to the airframe before applying power. Builder's note: After making an adjustment I bolt the module back down with one bolt to ground it before testing.
Step 2: Double check trim tab direction of travel. Adjust the trimpot on the rear of the control module to get a run time of ~25 seconds from stop to stop. Builder's note: Mine started at 47 second and required around 9 1/2 counter-clockwise turns of the pot to get it down to 25 seconds.
This completes page 45A-09.

