Usually before starting this section for the RV-12 aircraft the tailcone and tail surfaces are already installed. That is not the case with my airplane project. But in looking over other people projects at least the first few pages of this section can be completed (and they may be easier) with the tailcone not installed.
Installing the push rod end into the control columns can be a challenge because of the two small washer. So I put together a short video on how to do this easily with "No Sweat". The link is below.
Step 1: Bolt the Brake Reservoir to the Firewall Upper using the hardware called out by Vans' Aircraft.
Builder's note: It's not called out but I am planning on fire caulking the gap around the bottom fitting that goes through the firewall.

Step 2: Secure the Reservoir Brake lines to the Brake Reservoir. Loosen the Nylon Nuts, insert the reservoir brake lines, push hard until they bottom-out in the Male Nylon Tee, then tighten the Nylon Nuts. Use thread sealant for the connection between the Male Tee and the brake reservoir.
Builder's note: I used Ez-Turn on the threads.

Step 3: Secure the Reservoir Brake lines and Cross-Over Brake lines (the four brake lines attached to the right side master cylinder) to the bottom of the Panel Base using the hardware called out on page 32-02 of the RV-12 plans.


This complete page 32-02.
Reference: page 32-03
Step 1: Separate the Flaperon Mixer Bellcrank into individual parts.

Step 2: Rivet the Flange Bearing to the Flaperon Mixer Bellcranks.

Step 3: Make the Flap Handle/Pushrod Assembly using the parts called out on page 32-03 of the RV-12 aircraft plans. Thread in the rod-end bearing to attain the dimension given in the figure in the plans (note the dimension is from the centerline of the rod-end bearing to the edge of the Flap handle.)

This completes page 32-03.
Reference: page 32-04
Step 1: Trim the corners from the two Flap Handle Blocks.
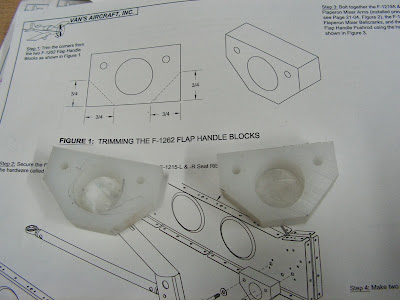
Step 2: Secure the Flap Handle/Pushrod Assembly to the inboard Seat Ribs using the Flap Handle Blocks and hardware called out by Vans Aircraft on page 32-04.

Builder's note: this is a good time to complete steps 1 & 2 on page 53-09 if installing the ADS_B system.. These two steps install a wire shield to protect the cable from rubbing on the flap handle.
Step 1: page 53-09 Use a bench vice or hand seamer to bend up the Wire Routing Bracket F-00050 flanges as show in figure 1 on page 53-09 of the RV-12 aircraft plans.

Step 2: page 53-09 Secure the Flap Handle/Pushrod Assembly and Wire Routing Bracket to the inboard Seat Ribs as shown in Figure 2. Use the Flap Handle Blocks and the hardware called out.
Reference: page 32-04
Step 3: Bolt together the Flaperon Mixer Arms Installed previously, see page 32-04, figure 2), the Flap Handle Pushrod using the hardware called out.
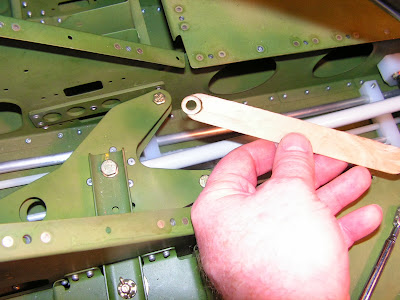
Step 4: Make two Control Stick Pushrods according to the dimensions given using a # 3 drill and 1/4-28 tap (see page 32-04 of the RV-12 plans.)


This completes page 32-04.
Reference: page 32-05
Step 1: Make two Control Stick Pushrod Assemblies.
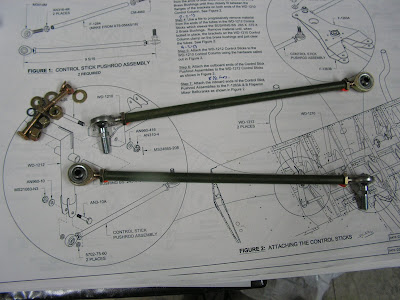
Step 2: Clamp the Bushing BS Brass Bushing in a bench vise(be carful not to over tighten or gouge the bushing), then drill the inside diameter using a 1/4 bit.
Builder's note: I used a lathe at work to complete the above step.
Step 3: Use a file to progressively remove material from the ends of both bushings until they closely fit between the flanges of the brackets on both ends of the Control Column.

Step 4: Use a file to progressively remove material from the ends of the tubes in the Control Sticks which sleeve the Brass Bushings. Remove material until, when bolted in place, the bracket on the Control Column clamp on the brass bushings and just clear the tubes.

Step 5: Attach the Control Sticks to the Control Column using the hardware called out in figure 2 on page 32-05.

Step 6: Attach the outboard ends of the Control Stick Pushrod Assemblies to the Control Sticks.
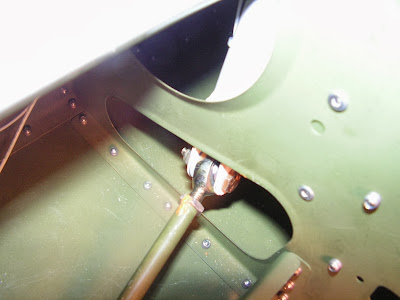
Builder's note: I used the "No Sweat" method called out in my video mentioned above.
Step 7: Attach the inboard ends of the Control Stick Pushrod Assembilies to the Flaperon Mixer Bellcranks.

This completes page 32-05. I hope you enjoyed the video and it makes life a little easier.


 Posts
Posts

