Today starts a new section of work on the RV-12 ELSA airplane build. That is work on the Spinner and propeller.
Step 1: Mark the Pitot Tube by wrapping tape 1 1/4inches from the aft end. Insert the pitot tube into thePitot Block up to the edge of the tape. The threaded portion of the pitot block is aft.
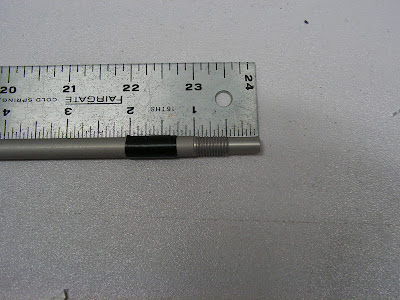
Flip the pitot tube and Block ver on a flat surface. Align the most forward point of the pitot tube with the top of the pitot tube with the top of the pitot block and make a small scratch to use as an alignment mark on the pitot tube and block.
Sorry no pictures of the front end of the pitot tube.

Note: The following steps are to create a dimple in the Pitot Tube without drilling through the inner wall.
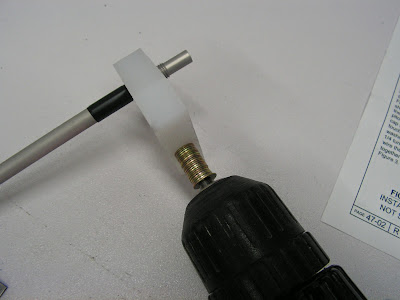
Step 2: Insert a #36 drill bit into the hole in the top of the Pitot Block. Press the bit down until it contacts the Pitot Tube.
Slip enough washers over the drill and press until the drill chuck is firmly seated against the washers. Tighten the drill chuck.
Builder's note: This is to create a drilling depth guide for makeing the dimple in the tube.
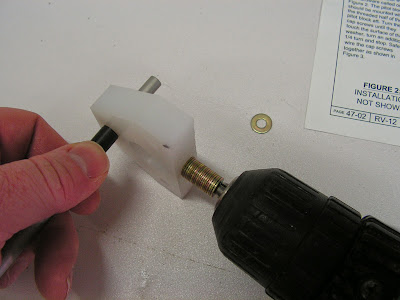
Step 3: Remove the drill and bit from the Pitot Block and remove one of the NAS1149F0332P thin washers from the stack on the drill bit. Then insert the drill back into the hole in the pitot block and drill #36 dimple in the pitot tube. But don't drill through the wall of the tube.
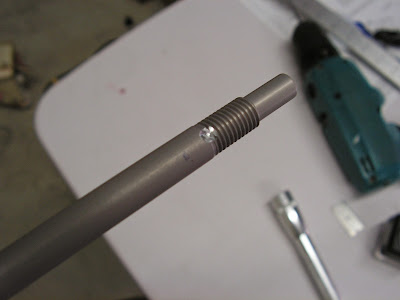
Step 4: Remove the Pitot Tube from the block as well as the tape from the tube. Carefully drill #29 the pilot dimple larger. Check progress frequently by sighting down the inside of the pitot tube. Stop drilling when a small bump appears on the inside wall.
Step 5: Mount the Pitot block with the hardware called out in figure 2 on page 47-02 of the RV-12 plans. The pitot block is mounted with the threaded half of the block aft. Turn the cap screws until they touch the surface of the washer, then turn an additional 1/4 turn and stop. Safety wire the cap screws together.
THis completes this blog entry for my RV-12 airplane build. So long until next time.

