Today is a split workday on the RV-12. I'm testing the fuel tank of the RV-12 airplane with air using the momameter as called out in the instructions that come from Van's Aircraft with the fuel tank test kit. Also, I'm continuing with the installation of the ELT.
Reference: Page 42C-15
Step 1: Attach the Fuel Neck Assembly to the fuel tank. Connect the air value and a long clear hose to the fuel return fitting and the fuel vent fitting. Cap the fuel line fitting.
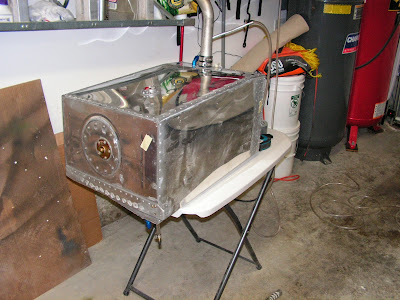
Step 2: Test for leaks according to the Fuel Test Kit.
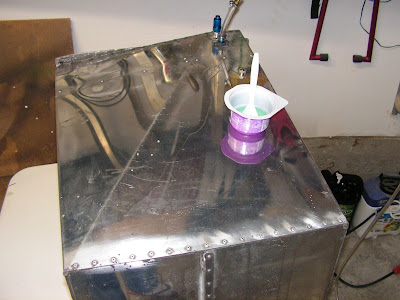
Testing for possible leaks with soap and water.
Builder's note: Be aware the monameter is very sensitive to both temperature and barometric pressure changes and can show movement of the level in the water column even without a leak. With a leak the level will drop and never come up. While temperature and barometric pressure changes will move water level in the column up and down over time). I had no leaks in my tank but to make doubly sure I like to fill fuel tanks with MOGAS and let it sit.
Reference: Page 42C-15
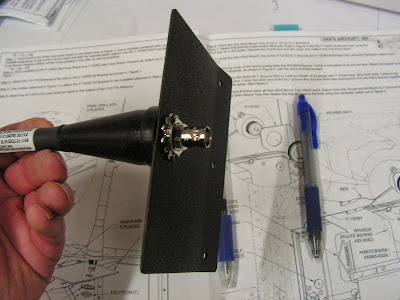
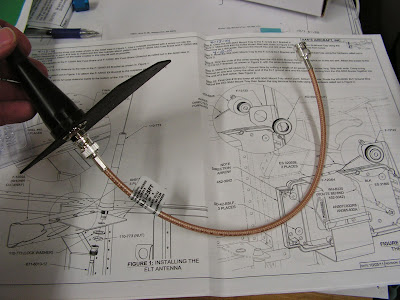
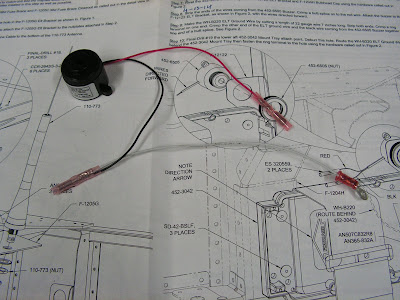
Step 3: Attach the ELT antenna to the ELT Bracket.
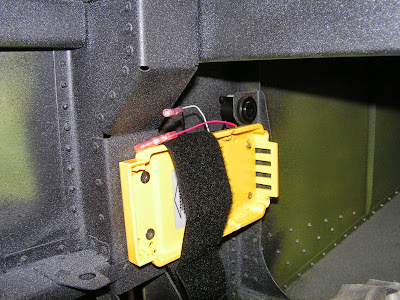
Builder's note: Step 4 deals with attaching the bracket to the airframe (which will be in the way for now, so it will be attached later.
Step 5: Attach the Coax Antenna Cable to the ELT Antenna.
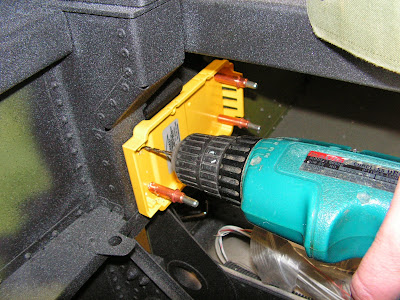
Step 6: Celco the ELT Mount Tray to the ELT mount on the airframe. And match drill #30 four places.
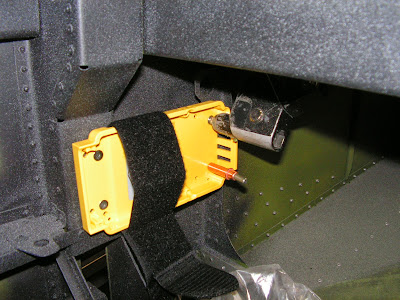
Step 7: Rivet the ELT tray to the airframe in three places.
Step 8: Strip the ends of the wires coming from the Buzzer Crimp butt splices on the red wire. Attach the buzzer to the ELT Bracket.
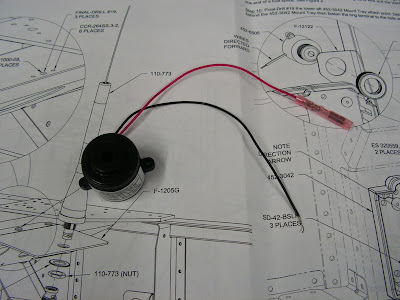
Step 9: Make a 7 inch Ground wire from 22 gauge wire. Strip both ends, crimpping a ring terminal on one end and crimp the other end and the black wire from the Buzzer together in one end of a butt splice. Install the buzzer with the wire pointing forwards.
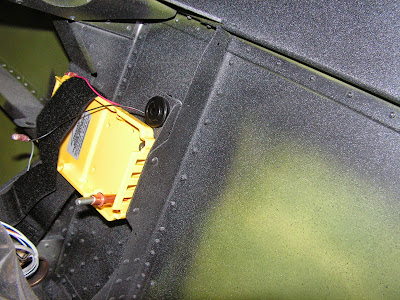
Step 10: Final Drill #19 the lower aft mounting hole on the ELT mount. Deburr the hole. Install the mounting screw and attach the ground ring terminal on the backside on the screw.
That's it for today's work on the RV-12 airplane kit. Until later.

