Today is the beginning of the rest of your RV airplane project! Van's Aircraft has introduced a new retrofit kit that helps reinforce the firewall and keep the forward fuselage panels from oil canning. I first read about it on Vansairforce.com which is an active Vans Aircraft forum. I am going creating a new index Label called RV12 Updates. So let's get started.
One last thing, I did jump around a little in this section while waiting for primer to dry. Now let's get to it!
NOTE: Use Boelube or equivalent when drilling through stainless steel firewall.
Steps 1-4 are NA: My RV12 is still in construction and these steps deal with a completed and flying RV12.
Step 5: Remove the four screws attaching the gascolator bowl to the gascolator and remove the bowl.

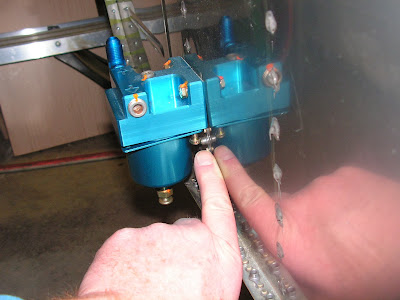
Builder's note: I had to loosen the screw I am pointing at, in the picture below, to get the left back retainer screw holding the gascolator bowl in place.

Step 6: NA I have not installed the landing gear so there was no need to remove the attachment screw.
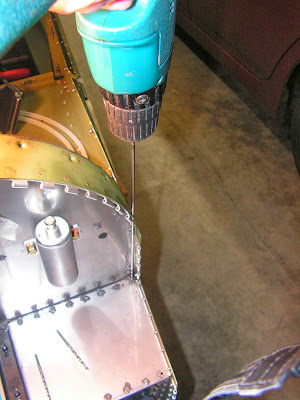
Step 7: Remove the called out rivet. See figure 3 on page 54-02.

This completes page 54-02.
Reference: 54-03 Step 1: Cleco the FF-1204E Firewall Stiffener Spacer to the FF-1204D Firewall Stiffener noting orientation. See figure 1 on page 54-03. Match-Drill #40 the stiffener using the #40 holes in the spacer as guides then remove the clecos. Machine countersink the #40 holes in the spacer on the side facing the firewall for the head of the called out rivet. Separate the spacers by removing the shaded area shown in figure 1 detail and deburr.
Rivet the spacers to the stiffener using a rivet squeezer and the rivets called out. Hereafter refer to this unit as the Stiffener Assembly.


Reference page 54-03
Step 1: Separate the Skin Stiffener into F-1295-MOD-L & R and deburr.
Builder's note: For the next steps I did both the left and right side of the fuselage at the same time.
Step 2: Remove the three upper-most rivets attaching the F-1202N Fwd Skin Stiffener to the F-1270-R & -L.
Builder's note: After messing with this process I ended up removing the stiffeners from the airplane, cutting them and re-riveting them back in. More on that in the next blog post.

Step 3: Remove the two rivets attaching the tab of the F-1202N-R & -L Fwd Skin Stiffeners to the aft side of the Firewall Upper.

Remove the two called out rivets on the F-1201B Firewall Shelf.
Draw a centerline between the two now empty holes on the shelf and layout four new holes locations using the spacing shown in the plans but do not drill them yet.

This completes page 54-04 and this entry. Next time I will go back and pick up the few steps I jumped over and then proceed.

