Saturday, January 18, 2014

Vans Aircraft RV-12 Airplane Build, Section 35: Landing Gear & Engine Mount (part 1)

Reference: Page 35-02, 35-03; 1.5 hours

Today officially starts the installation of the Landing Gear and Engine mount on the RV12 airplane kit. Technically I started it on 1/12/14 when I installed the engine mount while waiting for epoxy to cure, but it is getting documented here.

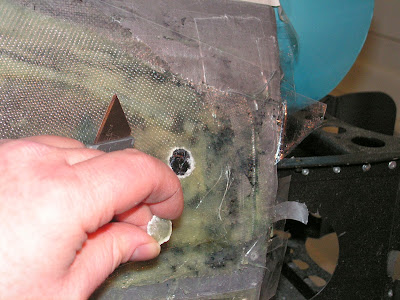
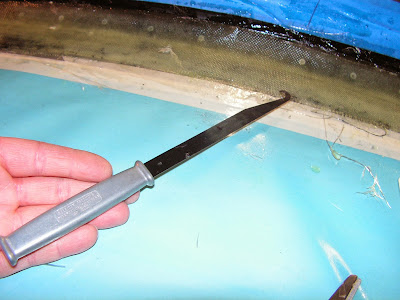
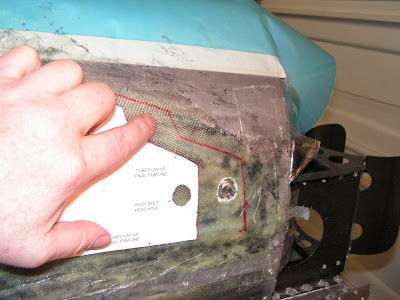
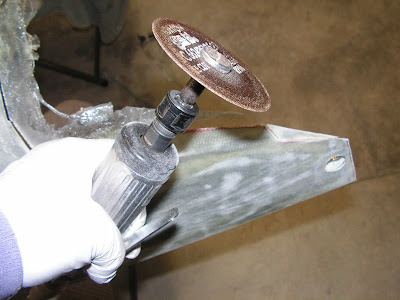
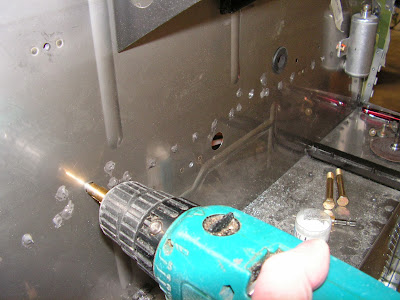
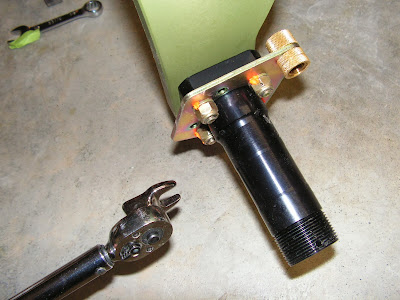
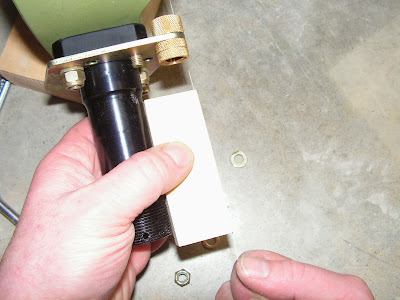
Step 1: Final drilled the two 3/16" holes to 3/8". Used a unibit to create nice clean holes. Also, to ensure holes were centered to the mount before drilling.


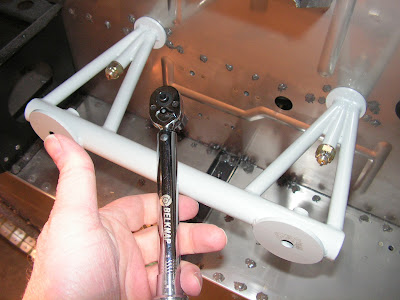
Step 2: Install hardware and upper engine mount and then torqued these to the specified values. I didn't have any alignment problems.


Builder's note: I jumped over the steps dealing with the nose wheel as I wanted to get the main gear on. Also I didn't have talc here to assemble the wheels.

Reference: Page 35-03

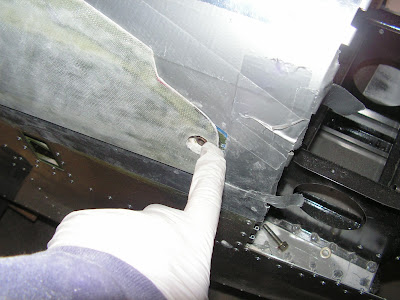
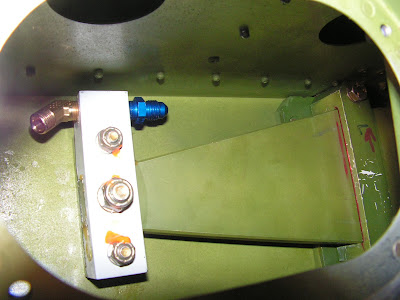
Step 1: Assembly of the two Main Gear Attach Brackets using Fuel Lube on the threads. Torque to correct values.

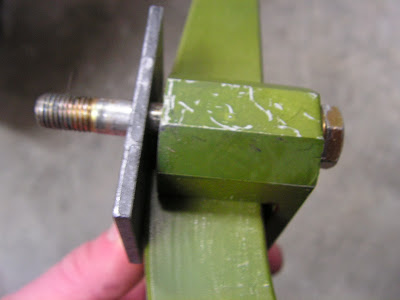
Step 2: Applied grease to the Outboard and inboard wear plates. And installed main landing gear legs. The SB was completed earlier during construction.

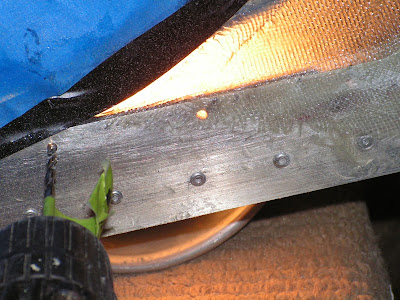
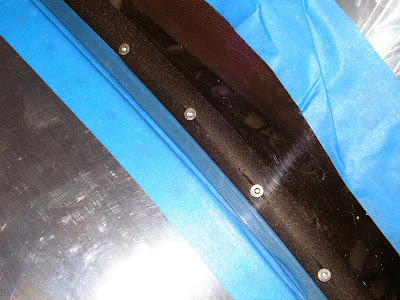
Builder's note: In the picture below you will notice the Gear Leg mounting blocks do not seat fully against the wear plates but rather just sandwiches the gear leg into place between the wear plate and block. I did talk to Van's Aircraft about this and it was designed that way on purpose and is the same design as used on the RV-8 tail wheel aircraft. So getting the torque values correct is critical!


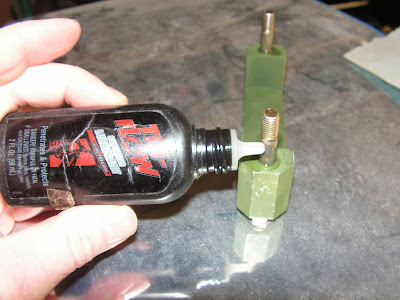
Builder's note: The bolt grip area is lubricated to allow for more accurate torque vales (see the landing Gear Service Bulletin SB 12-11-09)


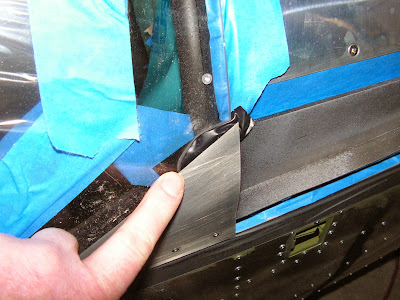
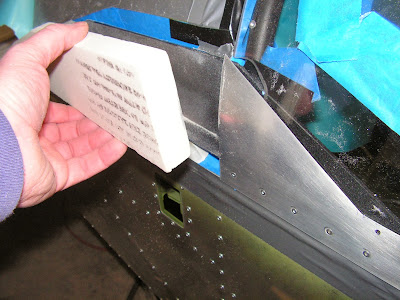
Step 3: Bolted on the main gear axles. Using the C-1211 wood block (remember the ones used as canopy spacers?) to check the alignment of the axles for toe in or toe out. There should be neither toe-in or toe-out on the main landing gear.


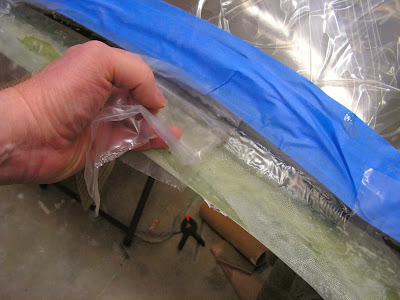
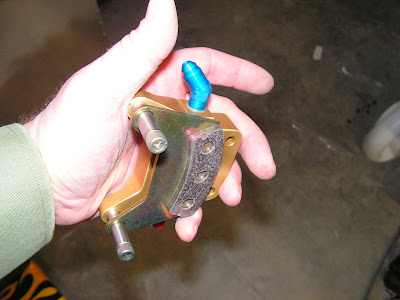
Step 4: Add the fluid fittings to the brake assemblies using thread sealant. The left and right side mirror each other.


This completes page 35-03 of the RV 12 construction plans. Next I will continue with more work on the RV12 landing gear.

Friday, January 17, 2014

Vans Aircraft RV-12 Airplane Build, Section 34: Canopy Installation (part 14)

Reference: Page 34-16; 7.0 hours

This entry is about final prep of the RV-12 airplane canopy aka sanding and filling fiberglass! In addition to fill I put a thin layer of epoxy over the exposed front edge of the canopy bubble. (Sorry no picture.) The reason for this is I want to paint the underside of the canopy fiberglass and don't want the paint to craze the plastic. Below are pictures of the final outline of the canopy fairing "wings".


I used UV Smoothprime to fill the pin holes in the fiberglass. First coat is applied using a scraper (old credit card, straight edge razor blade) to scrape the product into the holes and release the air in them.


After this has dried additional coats were rolled on using a small foam roller for a total of 5 or 6 coats. Also a foam brush was used on the spots a roller wouldn't fit.

Here's a look at the sealed canopy edge.


That's it for this entry other than a whole lot of block sanding!

Thursday, January 9, 2014

Vans Aircraft RV-12 Airplane Build, Section 34: Canopy Installation (part 13)

Reference: Page 34-16; 4.0 hours

Today's entry in more work on the RV-12 airplane canopy. For filling the weave of the glass cloth, low spots and large imperfections I use West Systems 410 light wight filler. However if an imperfection is near the edge of the canopy canopy canopy will use epoxy and flox to fill it. The reason for tis is the light weight filler doesn't have the structural strength and can chip is dinged on an edge.


Builder's note: For the first few applications a Sureform can be used to remove large amounts of material from a contour while it is still too soft to sand.


To fill the pinholes I will be using UV Smoothprime as it is compatible with the Epibond epoxy primer I am using as a primer for the exterior of the airplane.

Talking about compatibility, common practice when finishing epoxy layups is to use a spray can sand-able enamel primer and then to block sand to find high and low spots. Because Epibond is a two part epoxy it tends to cause enamel to lift (bad news)! Since this is the case I didn't use spray primers.

Wednesday, January 8, 2014

Vans Aircraft RV-12 Airplane Build, Section 34: Canopy Installation (part 12)

Reference: Page 34-16; 9.0 hours

The canopy fiberglass layup is complete on the RV-12 airplane kit. Because I didn't remove the gas struts earlier, so today's work is going to be more of a challenge.

Step 1: Cut out around the canopy pivot bolt.


Builder's note: Because the gas struts are installed I just can't remove the bolt and pop off the canopy. So first I loosen the lay up from the RV-12 fuselage using a chip chaser.


Step 3: Next I taped the canopy Trim template to the sides and carefully cut the fiberglass with a razor saw while protecting the underlaying structure with a thin piece of spring steel.


This gave me enough clearance to partial raise the canopy and remove the gas struts while compressing them. And remove the canopy.


With the canopy remove I finished trimming the fiberglass.


Step 2: Went back and redrilled the three holes on each side.


Step 4: Placed the canopy back on the RV-12 airframe and took care of any places it was hitting the fuselage as it rotated up.


Step 5, page 34-15: Sanding and filling of the fairing. The idea is to have a smooth transition into the bubble canopy. I like to put poly bag material over the epoxy to allow me to smooth out the area before it sets up and reduces sanding. It peels right off after it has cures.


After a lot of careful sanding the first layer of electrical tape is removed.


That's it for this entry I still have a lot of work to get the canopy fairing done on the RV-12. Not difficult just time consuming.

Monday, January 6, 2014

Vans Aircraft RV-12 Airplane Build, Section 34: Canopy Installation (part 11)

Reference: Page 34-14, 34-15; 7.5 hours

Today starts the fiberglass work on the RV-12 airplane canopy in ernest. Originally I planned on tinting the fiberglass black using epoxy tint from Tap Plastics, but I gave it to someone. Then I thought about using liquid Rite dye as West Epoxy systems suggested but after testing it I decided to just use epoxy as it comes and then covering the inside of the canopy bubble where it shows.

The RV-12 plans call for doing the two sides of the canopy fiberglass first and then trying to add the center fiberglass across the middle of the canopy. I decided to lay all three areas up at once. This will make for a much stronger layup. So today's entry is a mix of steps from the two pages. It's going to be a long day so let's get started.


Step 1, page 34-14; Contour the two foam blocks.


Step 2: Tape the canopy mask to both the left and right sides.


Step 2: Using the masks as a guide ran a strip of electrical tape from one side to the other side. Then laid a second layer of tape over it.


Step 4: Cut out the ten plies of 9 oz. fiberglass. A rotary cutter makes this very easy.


Step 1, page 34-15: Cut out the series of fiberglass strips as outlined.


Step 5, page 34-14: Sanded the exposed canopy with 60 grit sandpaper and clean it. Put packing tape over the duct tape so the exopy will pop loose after it has cured.


Builder's note: I used PVA mold release on the mylar tap versus the wax called out by Van's Aircraft, and let it dry before moving forward.


Step 6: Cut the upper edge of the canopy foam blocks to create a 1/8" shelf build these up with flox and epoxy.


Step 7 & 8 : Lay up the first layers of fiberglass cloth on plastic (I used poly material). Wet it with epoxy and lay it up on the RV-12 canopy.


Builder's note: The method I used is the do one layer on both sides and then the first layer of the center section. And then continued working this pattern up through all of the layers. Keep in mind the center section has 10 plys and the sides only have 5 so this need to be taken into consideration as layers are added. The trick is not to have pools of resin on the cloth. One method I've seen is to lay the next layer on dry and let it soak up the extra resin from the layer below. Then wet out any dry areas with more epoxy. Peal ply can then be placed over the finished layup. Because extra resin is just extra weight not strength.


Builder's note: I didn't cover the lower part of the fuselage under the canopy but it would be a good idea.

This completes pages 34-14 and 34-15. Step 5 on page 34-15 will be completed during the finishing of the canopy. With the heat left on I let the fiberglass work set and cure.

Saturday, January 4, 2014

Vans Aircraft RV-12 Airplane Build, Section 34: Canopy Installation (part 10)

Reference: Page 34-13; 2.0 hours

Fiberglass and epoxy work is just around the corner on the RV-12 airplane canopy! It's not bad stuff to work with just different from aluminum.

Step 1: Mask the instrument panel and the forward arm nests. Build'er Gothcha: Remove the gas struts if they are still installed! I didn't and while it is possible to remove the canopy after the fiberglass work is done, it adds more work and stress to the job!


Builder's note: I also ran tape on the inside of the canopy to fill the gap between the canopy bubble and the instrument panel and the gaps between the canopy and canopy frame.


Step 2: Put one thickness of duct tape on the edges of the Upper Forwrad fuselage and the upper forward fuselage skin.


Step 3: Trim the Canopy foam blocks.


Step 4: Position the foam blocks and mark and cut the 7/8" hole for the canopy bolt.


Builder's note: I covered the canopy bolt and washer with a thin layer of electrical tap.


Cleaned the arm with Lacquer Thinner. DON'T get this near the bubble canopy!


Here is the epoxy I used to glue the foam blocks on. It can be thickened with Flox. If this is your first time working with epoxy, talk to one of the composite airplane builders in your EAA chapter for pointers and possible some quick lessons. Before starting the fiberglass on the RV-10 kit, we have a workshop at our EAA chapter and it was well worth the time spent!


This completes page 34-13. Now it is time to let the RV-12 canopy set and cure.