Today I am still working on the tail fairing for the RV-12 airplane project. So let's get to it.
Reference Page 12-04
Step 1: Remove the rudder. Builder's note: I am leaving mine in place until painting. Because of this some steps are done in reverse. This is required so I could acess the front rivet on the Rudder Fairing.
Step 3: Rivet the Rudder tail fairing in place.

Builder's note: I used a hand rivet puller to reduce the likelihood of cracking the fairings.
Step 2: Rivet the V-Stab fairing into place.

Step 4: The rudder is already installed.
This completes page 12-04.
Reference: Page 12-05:
Step 1: Separate the F-1294C Tabs
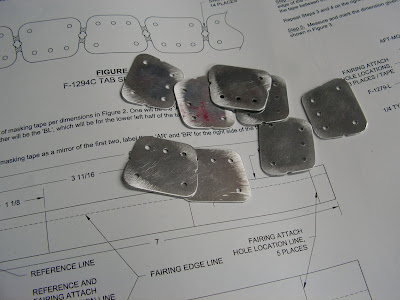
Step 2: Mark masking tape per the dimensions provided by Van's Aircraft. Also make a mirror set.
Builder's note: I messed up the mirrored set and had to correct them before applying them.


Step 3: Place the AL tape on the upper left of the tail cone. Align the forward edge of the masking tape along the rivet heads as called out in the RV-12 airplane plans.

Step 4: Place the BL tape on the bottom left of the tail cone as called out by Van's Aircraft. Repeat these steps for the other side of the tailcone.


Step 5: Measure and mark the tailcone attachment hole locations as show in figure 3 of the RV-12 lans on page 12-05.

This completes page 12-05 and this entry into the RV-12 airplane builder's log.

