Before continuing with the installation of the tailcone on the RV-12 airplane, there are a few avionic wiring jobs that will be much easier to finish at this time.
NOTE: Snap bushing inserted on this page are to be used for wires routed through the F-1202F and F-1203A Bulkheads in the remainder of this section.
Step 1: Drill #30 a pilot hole in F-1203A Bulkhead using the dimensions given in figure 1 on page 42D-14 of the RV-12 airplane plans. Use a step drill to enlarge the #30 hole to 3/4. Insert a snap bushing into the hole per the callout in figure 2.
Step 2: Drill #30 a pilot hole in F-1202F Bulkhead using the dimensions given in figure 3. Use a step drill to enlarge the #30 hole to 3/4. Insert a snap bushing onto the hole per the callout in figure 2.
Builder's note: The two above steps were completed earlier but I reconfirmed that the steps have been completed.
This completes page 42D-14.
Reference page 42D-15
Page 42D-15 talks about the various ways that the update could be wire and provides some good information. The big thing for my build is that I am using the the following harness:
WH-RV12_TUNNEL + WH-00036 = WH-00046
WH-RV12-OPTIONAL + WH-00025 = WH00045 & WH-00025
The WH-00026 Option Conversion Harness combines both the WH-00045 Options Harness and WH-00025 SkyView AutoPilot Harnesses into one harness that make the same two connections to the AV-50000A RV-12 Control Module. When asked in Section 42C to install either the options or autopilot harnesses simply install the appropriately labeled harness on the WH-00025 instead.
Reference 42D-16
Step 1: Remove the backshell from the main 25-pin d-sub on the WH-RV12-OPTIONAL harness. Check that WH-F193(WHT/BLK) and WH-F192(ORN) are installed as shown in figure 1 on page 42D-16. If the wires are not installed but loose in the harness install ES SA-1017 Female D-Sub Sockets on the end of each wire per the instructions in Section 5W Electrical Wiring Notes, Repairing D-Sub Pins then insert them into the correct locations as shown in figure 1 on page 42D-16 of the RV-12 airplane plans.

Step 2: Find the wires going to the AP-74 25-pin d-sub from the main 25-pin d-sub on the WH-RV12-OPTIONAL harness. The AP-74 25-pin d-sub will be no longer used with the SkyView sytem. Coil and tie-wrap this d-sub in a safe location. As an option cut off this d-sub and heat over the end of each wire.

Step 3: Install the backshell assembly back onto the main 25-pin d-sub on the WH-RV12-OPTIONAL harness.

Builder's note: I didn't shrink the heat shrink tubing as my guess is I will need to install additional wires later in the build.
This completes page 42D-16. Page 42D-17 will be completed later.
Reference: 42D-18
Step 1: Pull excess wire from the WH-RV12-TUNNEL and WH-RV12-OPTIONAL harnesses down through the Panel Base until the backshells of these harness are in the approximate location shown in figure 1 on page 42D-18. Route the WH-RV12-TUNNEL and WH-RV12-OPTIONAL wiring harnesses through the slots for snap bushings in the left Com Support.


Step 2: Slit a snap bushing saved from the Inst Stack Supports previously in this section then install it around all wires and the Aft Pitot Tube going through the Com Support except the WH-RV12-OPTIONAL harness. Insert the bushing into the lower snap bushing slot in the com support.
The remaining steps on this page will be completed after the pitot tube and other wiring is ran.
Reference: 42D-21
Step 3: Route the WH-P323 (WHT) four conductor shielded wire, twisted HW-319 (GRN) and WH-F320(BLU) wires and twisted WH-F321 (WHT/GRN) and WH-322(WHT/BLU) wires along the path of the WH-RV12-TUNNEL wrining harness to the tailcone area location of the magnetometer.
Step 4: Tie-wrap routed wires as required.
NOTE: Reference page 31-12 for the remaining steps on this page.
Step 5: Find the ES 9 pin BACKSHELL 2 on the end of the WH-RV12-TUNNEL wiring harness disconnected.
Builder's Note: The above step doesn't really apply because this wire harness was never connected to the magnetometer.
Extract the remaining wires from the ES-205203-3 9-pin D-Dub. These wires will no longer be used or connected at the AV-50000A RV-12 Control Module. Fold the wires back and tie-wrap them to the wire run along the F-1208 Bulkhead.
Builder's note: Since these wires are not used I estracted them from the wire harness and removed them from the airplane. I don't like extra wires just running around.
Step 6: Find the WH-P323(WHT) four conductor shielded wire, twisted WH-F310(GRN) and WH-F320(BLU) wires and twisted WH_F321(WHT/GRN) and WH-322(WHT/BLU) wires routed previously to the tailcone area coming from the WH-00036 RV-12 Tunnel Conversion Harness and insert them into the ES-205203-3 9-pin D-Sub as shown in figure 1 on page 42D-21 of the RV-12 aircraft plans. Install the ES 9 PIN BACKSHELL 2 onto the 9-Pin D-Sub.

Step 7: Separate out the WH-RV12-OAT wiring harness RED, YEL, and BLU. These come from a multi-conductor shielded wire. Remove 3 inches of the shield then clip the RED wire 1 inch from the end of the shield. Cover the exposed shield (and RED wire) with a piece of heat shrink. Strip the ends of the BLU and YEL wires. Attach the BLU and YEL wires to the WH-00008 SkyView OAT Connector Harness using the butt splices called out in figure 2 on page 42D-21.

Reference: page 42C-19:
Steps 3 & 4: Install the OAT wiring harness and the Fuselage Harness to the aft side of the ADAHRS 200.
This completes page 42C-19.
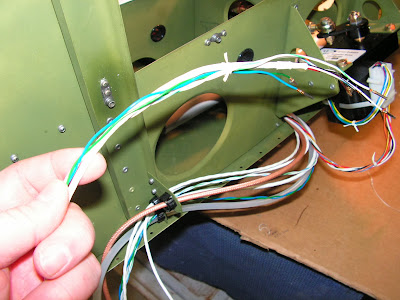
Now that the wiring necessary for attaching the tailcone is done, next time I will start back on the attachment process. But I will leave you with a couple of pictures of the completed tailcone wiring.


