This is the third installment of the RV12 aircraft fuel tank construction. Please note I'm using revision 11/12/11 of the the plans from Van's Aircraft. Today was a light day of working with the fuel tank sender unit. Enjoy
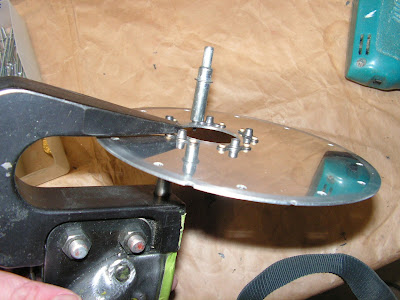
Step 1: Machine countersink the forward side of the T-1209 Res Sender Plate for nutplate attach rivets.

Step 2: Rivet nutplates to the T-1209 Res Sender Plate as shown in Figure 1.
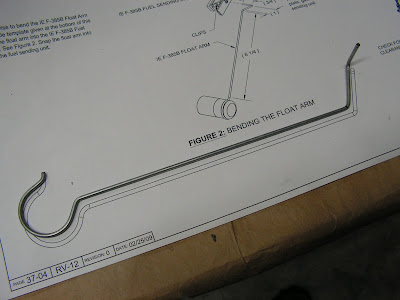
Step 3: Use a vise to bend the IE F-385B Float Arm per the full scale template given at the bottom of this page. Insert the float arm into the IE F-385B Fuel Sending Unit. See Figure 2 of the RV12 plans. Snap the float arm into the clips on the fuel sending unit.
NOTE: The IE F-385 Gasket in the following step is used only as a spacer to represent the thickness of the fuel tank sealant that will be used for the final assembly. THE GASKET WILL NOT BE USED IN THE FINAL ASSEMBLY.
Step 4: Temporarily attach the T-1209 Res Sender Plate and IE F-385 Gasket and IE F-385B Fuel Sending Unit to the Fuel Tank Assembly as shown in Figure 3. Use the notches to orient the sender plate. The small notch will be offset outboard, of the large notch that will be centered at the bottom. Check for clearance between the T-1208 Baffle and the IE F-385B Float Arm. Check and adjust the float arm for proper travel. See Figure 4. Remove the res sender plate, gasket, and fuel sending unit.


This completes page 37-04 of the RV12 fuel tank construction. Until next time!

